Molly-guard to save the day

If you have one or multiple boxes running somewhere at a remote location and you manage them trough ssh, you’re possibly familiar with the following situation.
It has been a long night.
On your desktop there are multiple terminals gaping in the dark.
During the whole night, some of these dark ships transported you to far remote playgrounds and back.
The other  ones were mere destined for local hocus-pocus.
But it’s time to call it a day and go to bed.
You fire away the ‘poweroff’ command just to realize a fraction of a second later that this was the window to your homebrew webserver…

But it’s too late.
The connection is lost and the machine has no wake on lan…
Now you have to get out of your chair, find those damned pants and go all the way up to the attic to switch it back on.

No one likes this horrible situation. So Molly-guard is here to save the day.
Molly-guard is is a bunch of scripts that capture the halt, reboot, shutdown and poweroff  commands and give you a second chance.
By checking if the tty has been created by sshd, it checks whether you’re logged on from a remote machine.
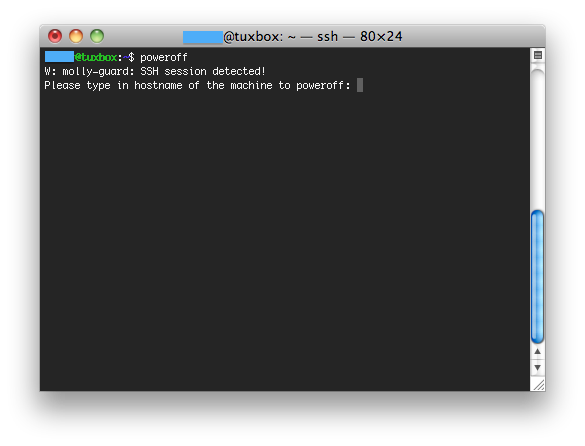
If that’s the case, molly asks you the hostname of the machine you want to shut down.
If the hostname you entered does not match the hostname where Molly is running on, you’re saved 🙂

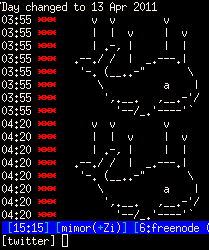
You might think this is a silly tool, but after a long time of silence, I’m back to using my home server and just saw this screen:

A little cool thing to know:

A shield to prevent tripping of some Big Red Switch by clumsy or ignorant hands. Originally used of the plexiglass covers improvised for the BRS on an IBM 4341 after a programmer’s toddler daughter (named Molly) frobbed it twice in one day. Later generalized to covers over stop/reset switches on disk drives and networking equipment. In hardware catalogues, you’ll see the much less interesting description “guarded button”.

— http://www.catb.org/~esr/jargon/html/M/molly-guard.html

Molly-guard man page from ubuntu: here
[FSF]: Stand up for your freedom to install free software

Stand up for your freedom to install free software — Free Software Foundation — working together for free software.

When done correctly, “Secure Boot” is designed to protect against malware by preventing computers from loading unauthorized binary programs when booting. In practice, this means that computers implementing it won’t boot unauthorized operating systems — including initially authorized systems that have been modified without being re-approved.

The biggest issue with the “Secure Boot” system, is that it’ll create a vendor-lockin. This has been seen with the android system as well, but it’ll be Microsft pulling the strings on this one.

Some other interesting reads on Secure Boot:

http://arstechnica.com/business/news/2011/09/windows-8-secure-boot-will-complicate-linux-installs.ars

http://www.osnews.com/story/25180

Who’s there? – Invalid ssh user

So, It’s been a while since I’ve set up my home server to use it as a swiss army knife at home and on the road.
Now I was wondering on the system’s integrity.
First step was checking /var/log/auth.log
To do some quick’n’dirty check I’ve ran the following command

grep “Invalid user” /var/log/auth.log | less

Continue reading Who’s there? – Invalid ssh user

Twirssi error: Timestamp out of bounds

I just found my twirssi inactive. 
When loading the script and authenticating with oath enabled, I got the error:

-!- Irssi: Error in script twirssi:
Timestamp out of bounds

This is (most likely) the result of a wrong system date/time.
Quite easy to solve, just sync it to an NTP server.
Open a terminal and enter:

ntpdate pool.ntp.org

Try to load the script again and login.
All should be fine now.

How to split flash (.flv) file to upload to youtube

Say, you have a huge flv flash file you want to upload to youtube.
You’ll find yourself in trouble as there is a limit to the filesize you can upload.
Where you needed to download and install bloatware in Windows to accomplish this,
it’s super easy in Linux.

ffmpeg will do the trick.
Say you want to cut the flash movie in pieces of 10 minutes, you can do this like this:

ffmpeg -i filename.flv -ss "00:00:00" -t "00:10:00" filename_chunk.flv
ffmpeg -i filename.flv -ss "00:10:00" -t "00:20:00" filename_chunk2.flv
ffmpeg -i filename.flv -ss "00:20:00" -t "00:30:00" filename_chunk3.flv
...

Now you’re ready to upload your video’s.

Nasty little OpenSSH Bug

So I’ve been using my Targa NT9231 as a home sever (Running Ubuntu 10.10 server edition) for a while now.
It’s been serving several purposes such as internal webserver, irssi, monitoring and tunneling/proxy server.

As all wise people should do, I’ve been using OpenSSH to connect to it.
Solely  connected to it from my netbook, as my desktop Ubuntu computer died after the purchase of a new ATI (curse you) Graphics card.
But now, I managed to revive my desktop (yay!) and wanted to log in on my server.
Setted up the key and wanted to transfer it to my authorized hosts file… but that gave me a bloody error:

Permission denied (publickey).

So I started to digg around and checked filepermissions, ssh_config file etc… But all seemed ok.
But then I found this little nasty openSSH Bug on launchpad.

Simply running “ssh-add” on the client fixed the problem!

Ssh-add adds identities to the authentication agent, sshagent. When run without arguments, it adds the file %HOME%/.ssh/identity. Alternative file names can be given on the command line. If any file requires a passphrase, ssh-add asks for the passphrase from the user.

I’m not sure how this could’ve helped, but hey, its a workaround that actually works 🙂

ASP.net GridView to display DetailsView on other page

So, I’m still working on that immo website.
On some GridView.aspx page, users see a GridView  with all items in my database.
I added a select button in front of each row.
I want the to redirect the user to some other page DetailsView.aspx when he/she clicked the button.
The problem, there is no redirect option in the GUI.
Again, Microsoft… loose the markup options in the Properties window and add some more functionality.

The solution for the people out there with the same frustration:

Double click the GridView item in your GUI.
You’ll get something as:

Protected Sub GridView1_SelectedIndexChanged(ByVal sender As Object, ByVal e As System.EventArgs) Handles GridView1.SelectedIndexChanged

End Sub

Now add the following code (note that this is in vb, so if you use C#, adjust the syntax)

Protected Sub GridView1_SelectedIndexChanged(ByVal sender As Object, ByVal e As System.EventArgs) Handles GridView1.SelectedIndexChanged
           Response.Redirect("DetailsView.aspx?ID=" & GridView1.SelectedValue)
End Sub

You might also want to add or modify some lines in your sqlDatasource (of the destination page) to match these lines.
This way you’ll see the DetailView of the item you clicked in the GridView.

<asp:SqlDataSource ID="SqlDataSource1" runat="server"
 SelectCommand="SELECT * FROM [Tablename]where [ID] = @ID"
<SelectParameters>
 <asp:QueryStringParameter QueryStringField="ID" name="ID" />
 </SelectParameters>
 </asp:SqlDataSource>

ASP.net mess

I’m currently working on some basic Immo website, in ASP.net 4.0.
(Part of the Exams)
I have to admit, programming is not my cup of tea… but I’m getting frustrated over all those (minor) flaws in Vistual Studio 2010.

If you’re setting up a registration page using the CreateUserWizard form the Toolbox, you’ll find some lack of properties-fields in the GUI.
In my case, I had to assign a default role to each new registerd user.
Nowhere in the Gui there is such thing to be found… sure… changing colors etc… but some REAL functionality… forget it!
The way to go is like this:
Just add some chunk of code.

Protected Sub CreateUserWizard1_CreatedUser(ByVal sender As Object, ByVal e As System.EventArgs) Handles CreateUserWizard1.CreatedUser
            Roles.AddUserToRole(CreateUserWizard1.UserName, "Member")
End Sub

I’m some kind of disappointed.
If you create some Wizard, why not do a good job, and add all possible options to the GUI?
Should you find yourself having too many options… perhaps, get rid of the image and color options?
There is such a thing as CSS for that!

Grmbl….

Create a .gif with The Gimp

This is requested by my dearly beloved mom, so I’ll keep it simple and mom-friendly.

The things you’ll need:

  • A Computer
  • The Gimp (Windows & Linux compatible)
  • Some pictures/images (preferably of the same size)
  • A (very basic) knowledge of what a .gif is
    A .gif is actually a little slideshow of images.
  • 5 minutes time
    or 10, depending on how fast you can switch between open windows.

Get started:

  1. Open up The Gimp
    I suppose I don’t have to explain how to do this?
  2. Open up the folder where the images are that you want to be inside the animated image


  3. Drag’n’drop the first image into the big empty Gimp window (the image you want to be displayed first in your ‘presentation’)
    If the order of the images don’t matter, just select all the images and drag’n’drop em all at once.

    • Press, and hold down, the button on the mouse or other pointing device, to “grab” the object,
    • “Drag” the object/cursor/pointing device to the desired location,
    • “Drop” the object by releasing the button.
  4. Drag’n’drop the second image into the big empty Gimp window (the image you want to be displayed as second in your ‘presentation’)
  5. Drag’n’drop the third image into the big empty  Gimp window (the image you want to be displayed as third in your ‘presentation’)
  6. Drag’n’drop the fourth image …. ok, you’ll get it now!
    Continue doing this till you’ve dragged all your images in to that window.
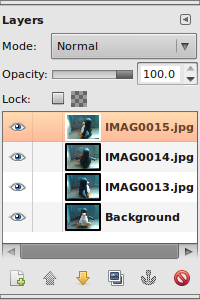
    You can check how many and which images are already in there in the Layer window.
    Open it by clicking ctrl+l or going to file\dialogs\layers.

  7. Click “File” in the top menu
  8. Click “Save As”


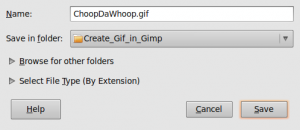
  9. Choose a location where to save the final .gif file
  10. choose a filename that ends with “.gif ” (eg. “ChoopDaWhoop.gif”, without the quotes ofc.)


  11. Select “Save as Animation”


  12. Fill in the comment, or just un-check it. (probably no-one will ever read it)


  13. Select “Loop Forever”

  14. Choose a delay value (this will set the time before switching to another image)
    Check out the image at point 13
  15. Click save
  16. Profit!